

I switched to Cloudflare Tunnel and ditched Ngrok
Tired of Ngrok's limitations? Discover how Cloudflare Tunnels can help you securely share your local development projects with the internet without deployments.
I'd been using Ngrok for a while. It's a helpful tool that allows me to quickly spin up local projects and share them with clients without needing deployment. In my case, I built a CloudIDE, and to address the challenge of hosting my React application on a local Docker container, I used Ngrok to tunnel the project to a publicly accessible URL for testing.
However, the free tier of Ngrok has limitations. It restricts you to a single tunnel at a time and doesn't allow customizing the domain name. To overcome these limitations and cutting the subscription costs, I looked for a self-hosted alternative that offered similar ease of use.
Unfortunately, I couldn't find anything that matched Ngrok's simplicity, where a single command-line program sets up the tunnel.
Then, I discovered Cloudflare Tunnels! While setting up Cloudflare initially might require a bit more effort compared to Ngrok, considering the features and flexibility it offers, I found it to be a worthwhile investment.
What is the Cloudflare Tunnel?
According to Cloudflare's website,
Cloudflare Tunnel provides you with a secure way to connect your resources to Cloudflare without a publicly routable IP address.
In simpler terms, instead of exposing your machine's (your localhost for example) IP, a lightweight program called cloudflared creates a secure, one-way connection directly to Cloudflare. This lets you easily share your in-progress website with colleagues or test it from anywhere with an internet connection. It's not just for websites either, Cloudflare Tunnel can handle standard HTTP servers and even allows you to tunnel SSH connections for secure remote access to your development environment. As an added bonus, your local development setup benefits from the security features that Cloudflare offers!
Installing Cloudflared
Cloudflare Tunnels offer two setup methods: through the dashboard or the command-line interface (CLI).
The first option involves using Cloudflare's Zero Trust Platform (ZTP). ZTP is, from my understanding, a security suite designed to manage access and connectivity across your network. It encompasses various functionalities, including tunneling capabilities. I will focus on setting up tunnels through the CLI, offering a more streamlined approach. This method assumes you already have a valid domain name registered and configured within Cloudflare.
Install the package on your machine
We'll first install the package on our local machine, where we want to tunnel our apps from:
sudo mkdir -p --mode=0755 /usr/share/keyrings
curl -fsSL https://pkg.cloudflare.com/cloudflare-main.gpg | sudo tee /usr/share/keyrings/cloudflare-main.gpg >/dev/null
echo "deb [signed-by=/usr/share/keyrings/cloudflare-main.gpg] https://pkg.cloudflare.com/cloudflared $(lsb_release -cs) main" | sudo tee /etc/apt/sources.list.d/cloudflared.list
sudo apt-get update && sudo apt-get install cloudflared
Authenticate the program
The following command will open up a new browser window and let's you login to your Cloudflare account and choose a domain. Take note that we want to host our local applications on a specific domain. For example, I want to tunnel all apps running on port 3000 to 3000.aien.me therefore aien.me is domain I'll choose. Yours I assume to be my.domain.
cloudflared tunnel loginCreate a tunnel
The next step is to actually create a tunnel in cloudflare. This will allow cloudlfare to generate a unique ID for you and the needed credentials for you to be able to tunnel your apps. Note that there's no connection yet established between your local system and cloudflare!
Also note that you can give it any names you want. I would prefer to give them logical names, for example, since I'm running the tunnel in my home machine, I'd call it wsl.home or wsl.work. (The . is not mandatory).
cloudflared tunnel create <TUNNEL NAME>Now if everything goes fine, it'll print out a tunnel id which you will need to reference in a configuration file.
Tunnel credentials written to xxx.json. cloudflared chose this file based on where your origin certificate was found. Keep this file secret. To revoke these credentials, delete the tunnel.

Created tunnel wsl.home with id xxx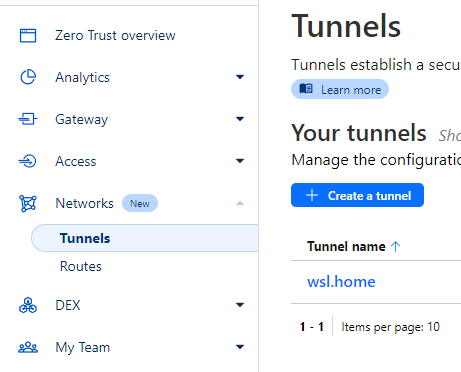
Doing the configuration
Now that we have our tunnel created, we need to tell cloudflared, which application on which port, would have to use which hostname on our domain and over which tunnel it should be routed.
For this matter, there's a configuration yaml that we'll use. If you take a look at your terminal where the tunnel got created, cloudflared already mentioned the path to you .cloudflared directory. By default it is addressed to ~/.cloudflared/. Will create our config file using
touch ~/.cloudflared/config.ymlAnd then we have to put the following default content in it:
tunnel: <Tunnel UUID>
credentials-file: /home/<User name>/.cloudflared/<Tunnel UUID>.json
warp-routing:
    enabled: true
Since we want to expose more than one local service to the internet, we'll also add the ingress config in the same file:
tunnel: <Tunnel UUID>
credentials-file: /home/<User name>/.cloudflared/<Tunnel UUID>.json
warp-routing:
    enabled: true

ingress:
  - hostname: hostname1.my.domain
    service: http://localhost:3000
  - hostname: hostname2.my.domain
    service: http://localhost:8000
  - service: http_status:404
Tip: If you want to control how you hostnames look like, take a look at the official documentation.
What is http_status:404?
Cloudflare ingress routes and hostnames will be evaluated from top to bottom. At the end, it should include a catch-all rule that concludes the file.
Add DNS record per hostname
Now we need to assign a CNAME record per each hostname (service) that we've registered, and we want to tunnel:
cloudflared tunnel route dns <Tunnel Name> <Hostname>as an example:
cloudflared tunnel route dns wsl.home hostname1.my.domainRun the tunnel
The last step is to actually run and start the tunnel to proxy the incoming traffic from the tunnel to our services.
cloudflared tunnel run <Tunnel Name>Conclusion
While setting up a Cloudflare Tunnel might take a bit longer compared to Ngrok, the benefits outweigh the initial time investment and its fun. Cloudflare Tunnels offer greater flexibility, cost-effectiveness, and a sense of ownership due to using your own domain.
Did this post help you set up your own tunnel and host your local projects? Share your thoughts in the comments below!
Comments